

In this blog, I will show you how to track your videos in Google Analytics 4, so you can measure their impact as a traffic and conversions driver, and compare their effectiveness against your other marketing assets. The tutorial is also available as a video, but I would recommend that you read the blog first as it might answer some of your potential questions about link tagging.
Why Track Videos
As Video is becoming a driving force in online engagement, marketers have to devote more time and resources to be able to keep up with their audiences.
With popular providers such as wideo.co offering automation and templates, video creative services are becoming more affordable, but the overall production time and expenses are still steeper compared to those of proven conversion magnets such as eBooks and eGuides.
Therefore, it is more important than ever to be able to track the success of your videos because you might be scoring a lot of views and interest, but a weak call to action might be affecting your asset’s ability to drive people to your conversion landing pages. Which is good news, because luckily calls to action take seconds to modify and don’t cost us almost anything.
So here is a very quick and easy way to track your video assets in Google Analytics:
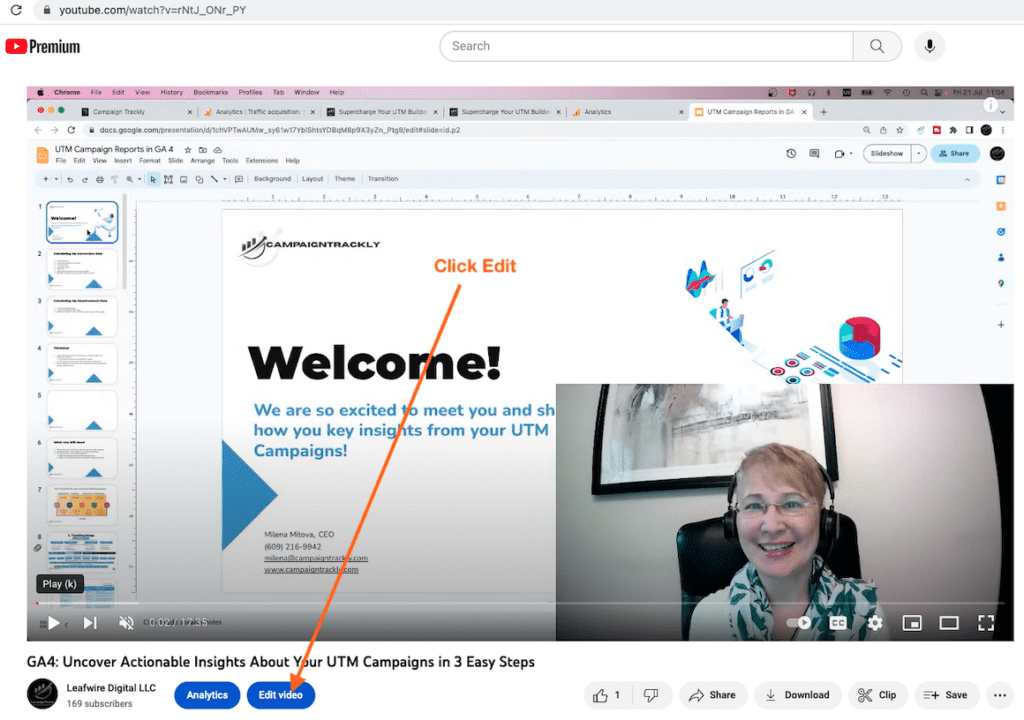
STEP 1 – Open the Video in the YouTube Editor
YouTube offers several ways in which your videos can drive traffic and conversions to your website, including Call to Action Overlays also known as Info Cards. Click here to learn more about the options available to you at this time.
- For this tutorial, I will focus on Info Cards. First, let’s open the video that you want to promote by Clicking the “Edit Video” button placed underneath your video. You need to have editing privileges to be able to create and edit videos. If you don’t – ask your administrator for help.
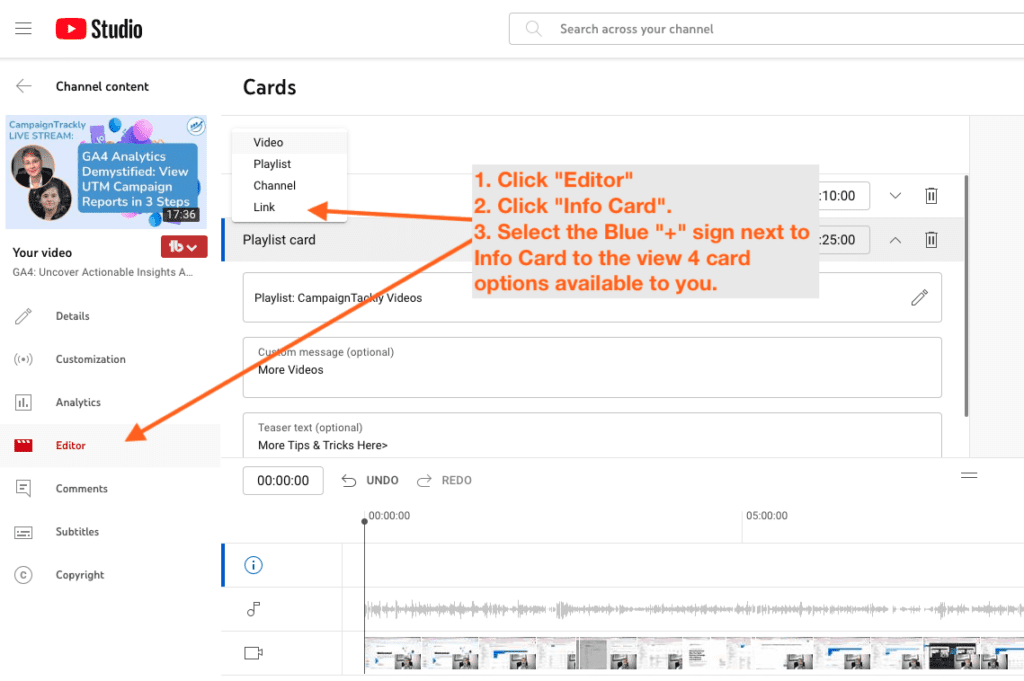
- Next, select “Editor” from your side bar to open the editing timeline of your video. Here we will click on Info Card. There are 4 Info Card Options in the drop-down that will display. Any of these 4 options will show on top of the video as it plays, inviting the person who is watching to take a particular marketing action.
Step 2 – Create The Link Info Card for Your Video
Select a “Link” Info Card
Since I want to send viewers to my blog that provides a detailed step-by-step guidance on how to create a custom conversion event (formerly known as Goal), I will select “link”.
Link or Destination URL
The Link or Destination URL is the address of my blog. So here, I would put my blog address, https://www.campaigntrackly.com/how-to-create-a-conversion-goal-in-ga4-easy/ – if I do not want to track the traffic generated by this activity in GA4.
If you DO WANT to track this link’s performance in Google Analytics 4, then please review Step 3 of this tutorial as well.
Step 3 will show you how to add to the Destination URL a few tracking parameters that will help you assess the value of your video in generating traffic and conversions on your website.
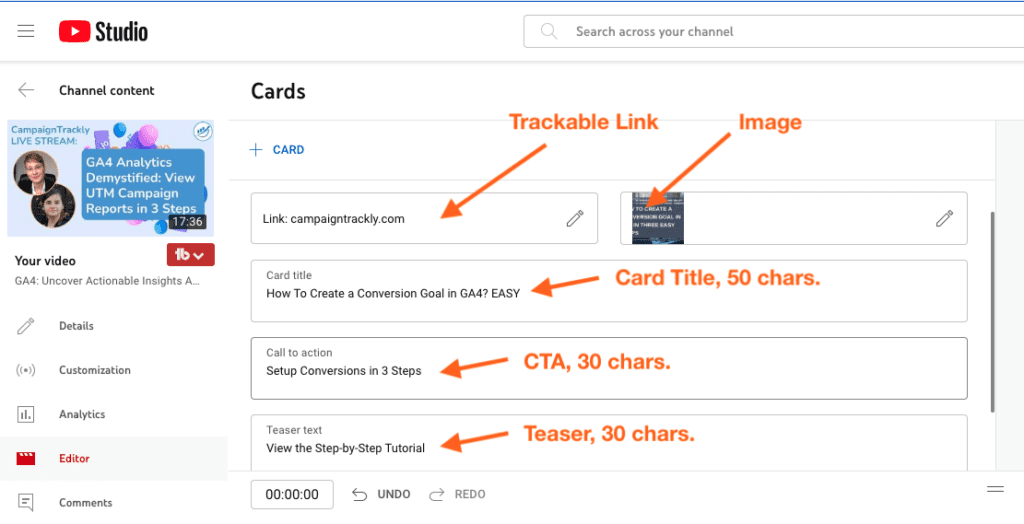
Image
Add an image to your Info Card – this is required. In my case, I added the featured image from my blog, which is 1280x720px.
Card Title
The Card Title has a limit of 50 characters. Try to create an effective title that will drive both SEO and interest in your info card.
Call To Action
Your call to action has a limitation of 30 characters. Try to provide a good reason to users to respond to your call to action – like “Learn How To Set up…”
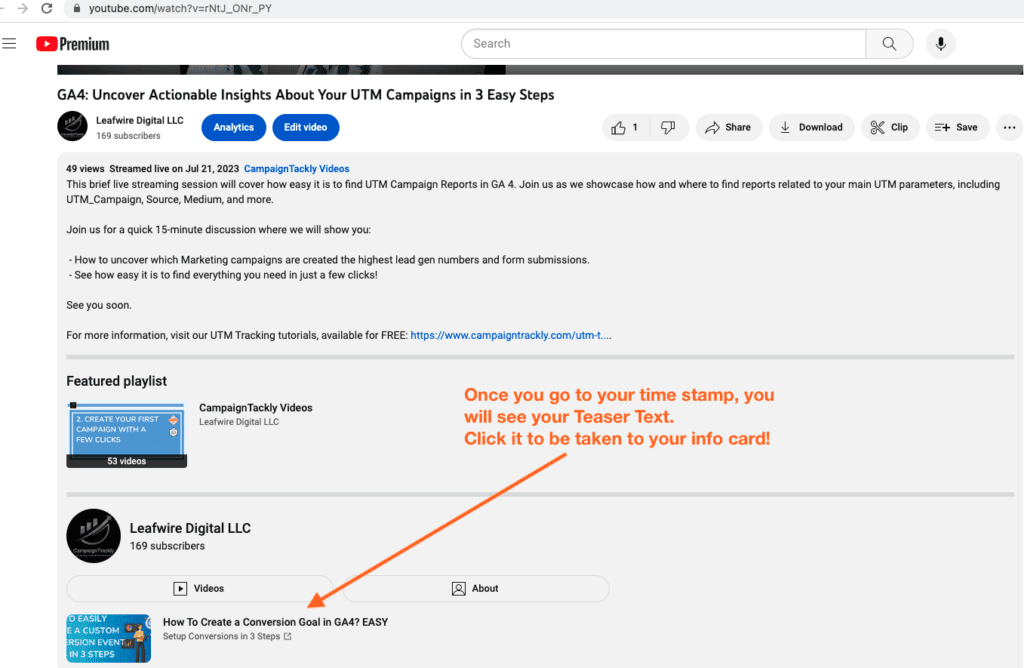
Teaser Text
The teaser text is what will show as an overlay while your video is playing. It also has a 30-character limit and needs to be convincing enough to get your viewers to click it.
STEP 3 – Tag Your Links With a Few Clicks
I worked hard to create my blog and I want to drive as much traffic to it as I can. At the same time, I also want to see which channels and activities are the best sources for visits to my blog. So I need to add tracking UTM tags to my info card link.
It is important to see if my video is driving incremental value by generating overall traffic and conversions as well. To do that I will use CampaignTrackly’s automated link builder to generate my tracking parameters and prep my link in no time.
The CampaignTrackly Chrome Extension in Action:
All it takes is a click on the icon of the extension and it opens up in a transparent layer on top of the blog page I am on. No need to go to the app.campaigntrackly.com site – everything happens in the browser.
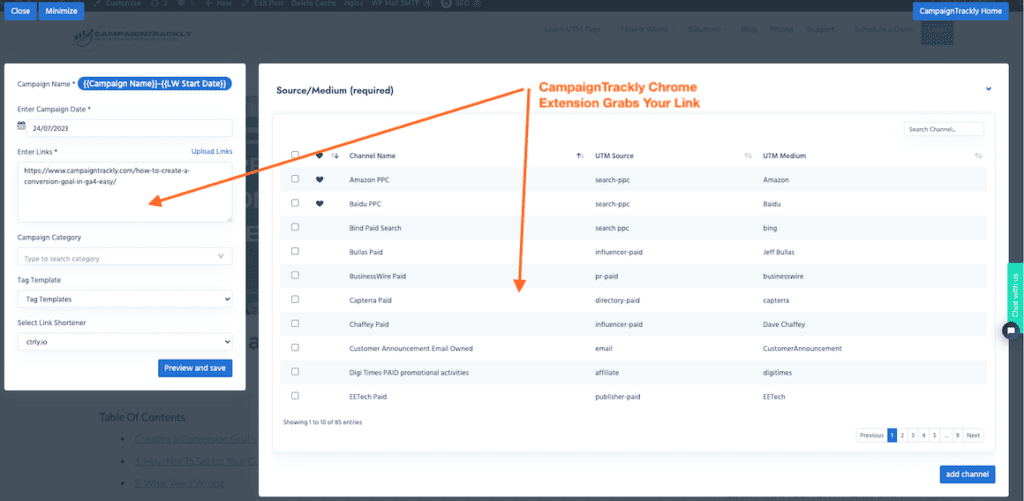
- Under Campaign Name, the app will capture the title of the blog unless you have a pre-set rule to generate UTM campaign from a set of custom tags.
- The extension also grabbed my blog’s web address, so there is absolutely no need for me to copy, type or paste the link.
- Next, I can click on the drop-down menu in the app’s Preset section and can choose a tagging preset template or I can quickly select the tracking parameters I need for my trackable link.
- The preset is a tagging template that I have created in CampaignTrackly, so I don’t have to type manually my combination of utm_medium, utm_content, utm_source, and term tags every single time I want to track the performance of my videos.
- My UTM Link is ready in seconds
- Now I am ready to Copy it into Youtube’s Info Card
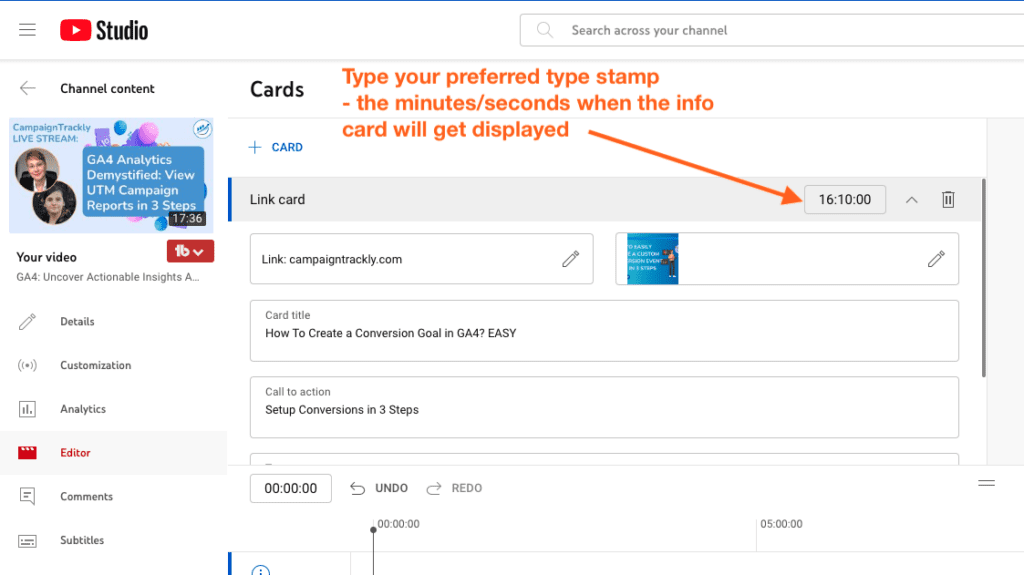
Step 4 – Define Where In Your Video The Info Card Will Get Displayed
Now it’s time to go back to YouTube and your video editor timeline. At the top right, enter your time stamp – the moment when you want your info card to display over your video as it plays.
Once you are ready, hit “save”. Your video is all set.
STEP 5 – Check the results in Google Analytics
Lets click on the actual video and push the play head to the moment where we expect the info card to be displayed – to make sure everything is working as expected.
STEP 5 – Check the results in Google Analytics
If you are using Universal Google Analytics, you can check your results as soon as you click to check if your clicks are being registered in your platform.
The way to do that is to go to Google Analytics>Acquisitions>Campaigns.
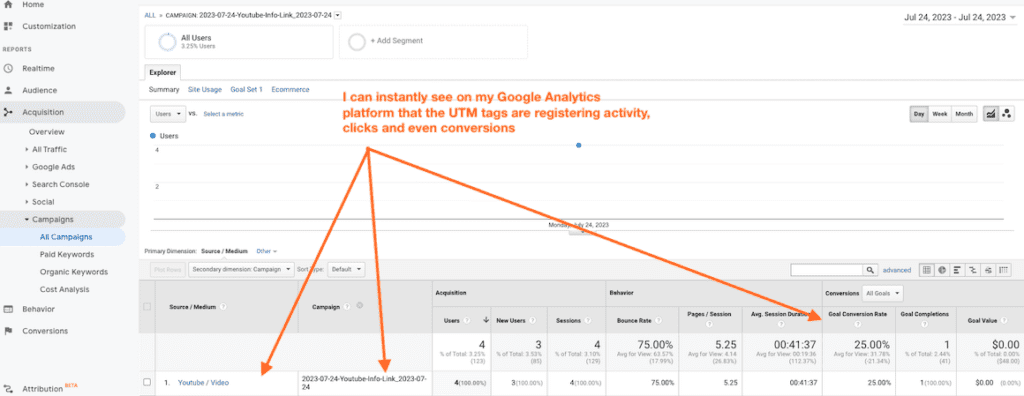
I am showing you the Universal analytics results because I have a filter on my GA4 reports which will hide my own clicks and tests.
Conclusion
And that’s all for today, hope this tutorial was useful and you learned how easy it is to track video performance in Google Analytics. If you have any questions, please do not hesitate to tweet us at @CampaignTrackly or visit us at www.campaigntrackly.com


