

Marketo has this amazing Email Script capability that enables you to do really cool and amazing personalization stuff in a manner of minutes.
What is Email Scripting?
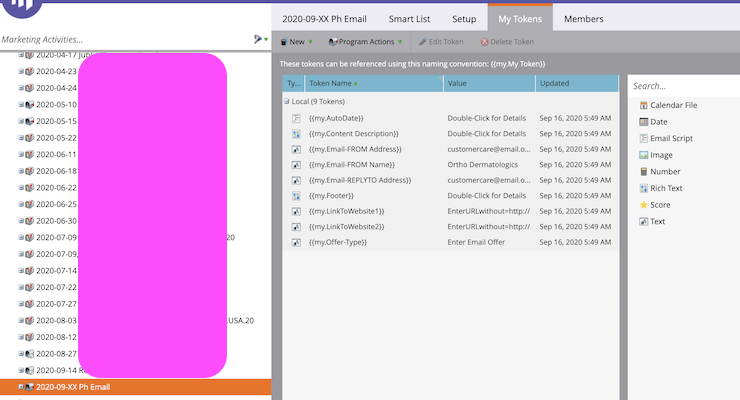
Marketo allows users to apply Apache Velocity scripts to its individual email assets through the use of clever snippets of code, called program-level tokens.
The words “Apache” and “scripts” really sound intimidating at first, but the more you look into them in detail, the clearer it becomes that these are easily re-usable snippets of codes that you can copy-paste into your Marketo Program’s My-Tokens area to see tremendous personalization gains for your programs.
The best part about this? You can setup your tokens and then convert your program into a sharable template that your users can replicate each time they need to start a new initiative.
Why you want to do that?
- To save a tremendous amount of production time for each new program
- To elliminate potential for errors as everything is pre-set for users and already populated in your email templates
1. The Auto-date script
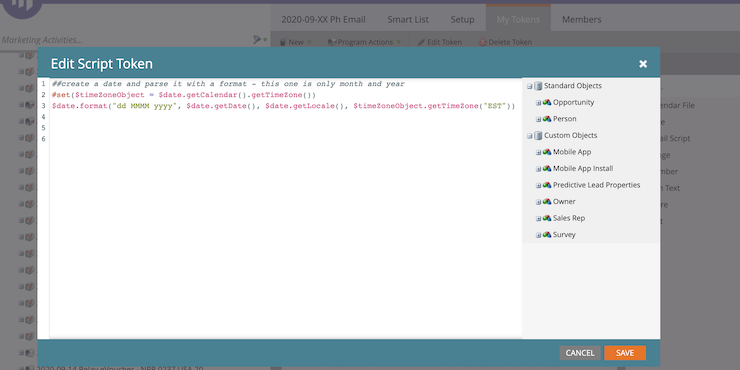
1. Here is a super easy “auto-date” script that you can save to all your email program templates – just make sure you enter the right time zone and the right date format you want:
##create a date and parse it with a format – this one is date month and year as defined by dd MMMM yyyy#set($timeZoneObject = $date.getCalendar().getTimeZone()) $date.format(“dd MMMM yyyy”, $date.getDate(), $date.getLocale(), $timeZoneObject.getTimeZone(“EST”))
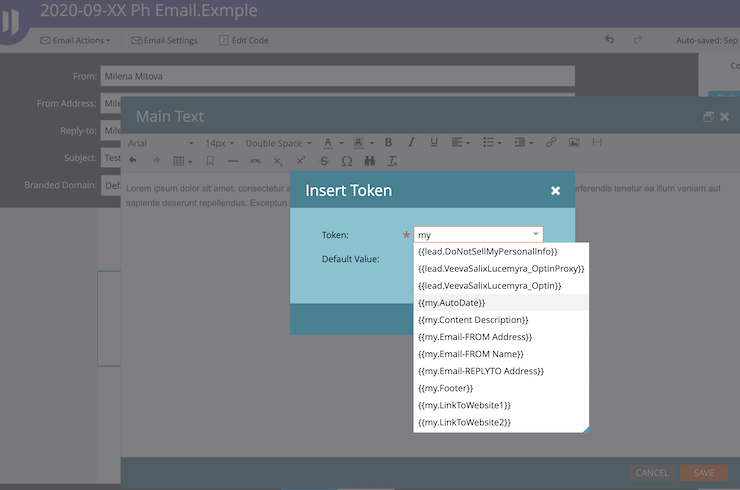
2. When added to emails, it automatically populates the date on which the email is being sent. Here is how to add the token to your email:
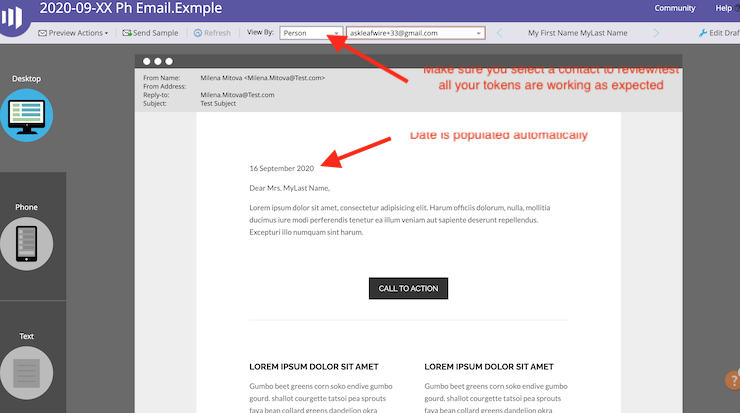
3. Once you populate your script token (or tokens – if you are using more of them), make sure you test that it’s showing by going to Email Preview and selecting a contact’s email to check that all your tokend are working as expected. Here is how to test:
2. Here is how to combine Program-level Tokens and Marketo fields to swap out dynamically images in a single email that serves a multi-segmented audience
1. Let’s say we have 2 or more promotional campaign offerings that we have developed for our customers. When users register for our promo, they will select the number of boxes they are interested in during registration and will get an auto-responder email starting them on their journey.
- We don’t want to create numerous emails for all our campaign denominations just because we want to have a customized header image for each group.
- That would mean having to maintain and prepare workflows for multiple assets and this adds time and creates more openings for error.
- We also do not want to use dynamic content, as that requires setting up segmentations and extra work.
That is why we will use a combination of Marketo fields and program-level tokens, giving us the option to build very quickly a nice email while letting our platform do the heavy lifting for us.
2. In our registration form, we will use the field “Boxes” to populate each user’s choice in their Marketo profile – whether users register for 40, 60, or 80 boxes of “widgets”. Then, we will just upload 3 images in the Marketo Design Studio storage and will use the following script for our image swap token (we will use only the actual image name, as in Image1.jpg for this and not the full image URL):
##upload a different image for every one of your campaign options to appear on the auto-responder emal based on user’s choice of number of boxes.#set( $imageByLeadBoxes = { “40” : “Image1.jpg”, “60” : “Image2.png” , “80” : “Image3.png” } ) http://go.bauschhealth.com/rs/350-OKO-721/images/${imageByLeadBoxes[$lead.boxes]}
The script will be able to automatically swap out the images, placing in the auto-responder header the one that corresponds to the value of the “boxes” {{lead.boxes}} field that each user has selected.
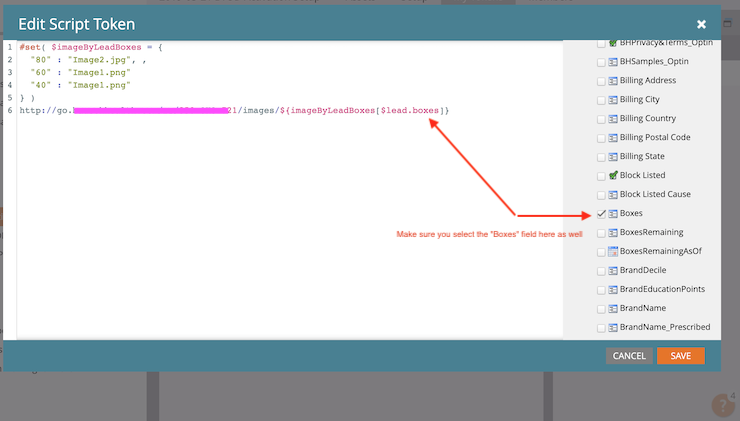
NOTE: When copy-pasting the script, we will make sure to “check” the correct relevant system field in the right hand-side column (Under “Standard Objects>Person” in our case) – otherwise the token will not work as Marketo will not know to connect the images with the value of the Marketo field.
3. Now we are ready to build our “dynamic” email. And it takes less than 30 seconds to make sure it works:
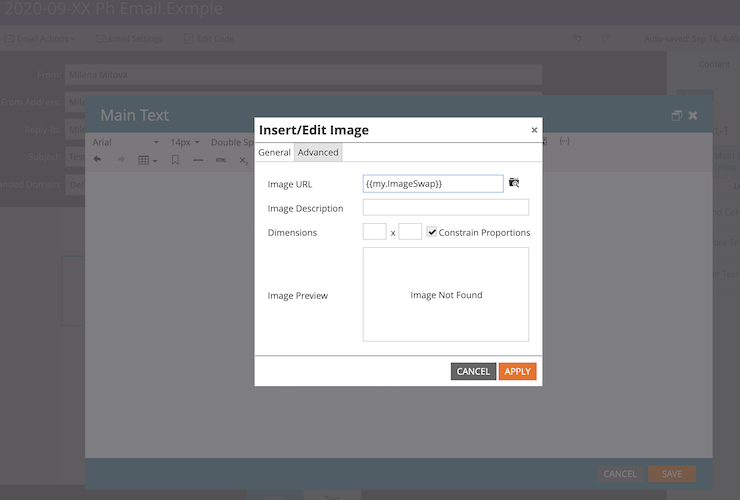
- We open our email, go to tokens and find our {{my.ImageSwap}} token.
- Then we open the “insert/edit image” option in the WYSIWYG Editor, placing the token into the Image url field and hit “Apply”
- Now we are ready to preview our email:
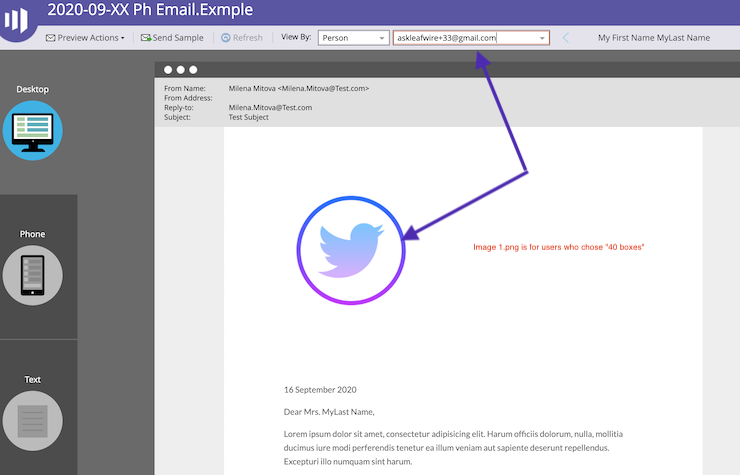
- Here is the user who selected the option “40” in the registration form and the email they will see has the right image for this group:
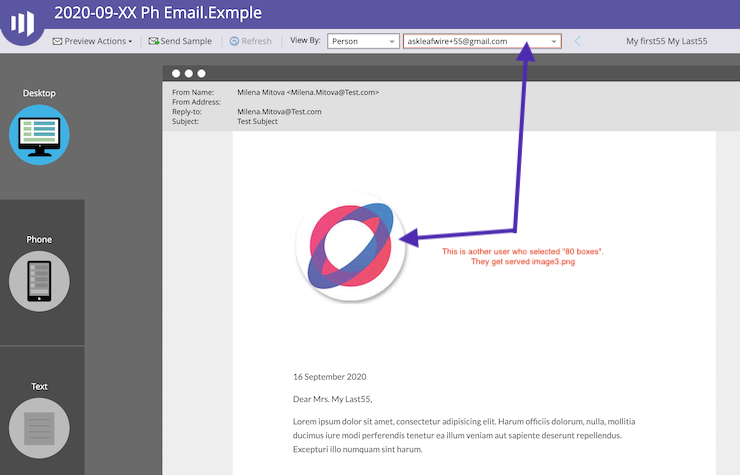
- Let’s select another user in our preview panel.
- Here is a user who selected “80 boxes”. They will see in their email the image that has been prepared for their campaign group, as expected.
Time to setup this dynamic email? Literally minutes. Impact? Really great – because you are serving personalized, segmented, dedicated content to your audiences.
You can replicate this example and can replace the images with paragraph texts or other elements. That would enable you to build great dynamic emails in no time.
Thank you for reading this blog, hope it was useful to you.
This blog is about: Marketo, Marketo personalization, Marketo Velocity Scripts, Email Scripting, Dynamic Images, Dynamic Date, Email


